Chapter 5 Q-Exactive Orbitrap Focus LC-MS/MS
5.1 Introduction
You can refer to Chapter 2 for the brief introduction of Orbitrap Q-Exactive.
5.2 Practical user manual
There are several actions to go through before injection of samples on the LCMS system:
5.2.1 Start N2 generator
Push the button to start generating N2.
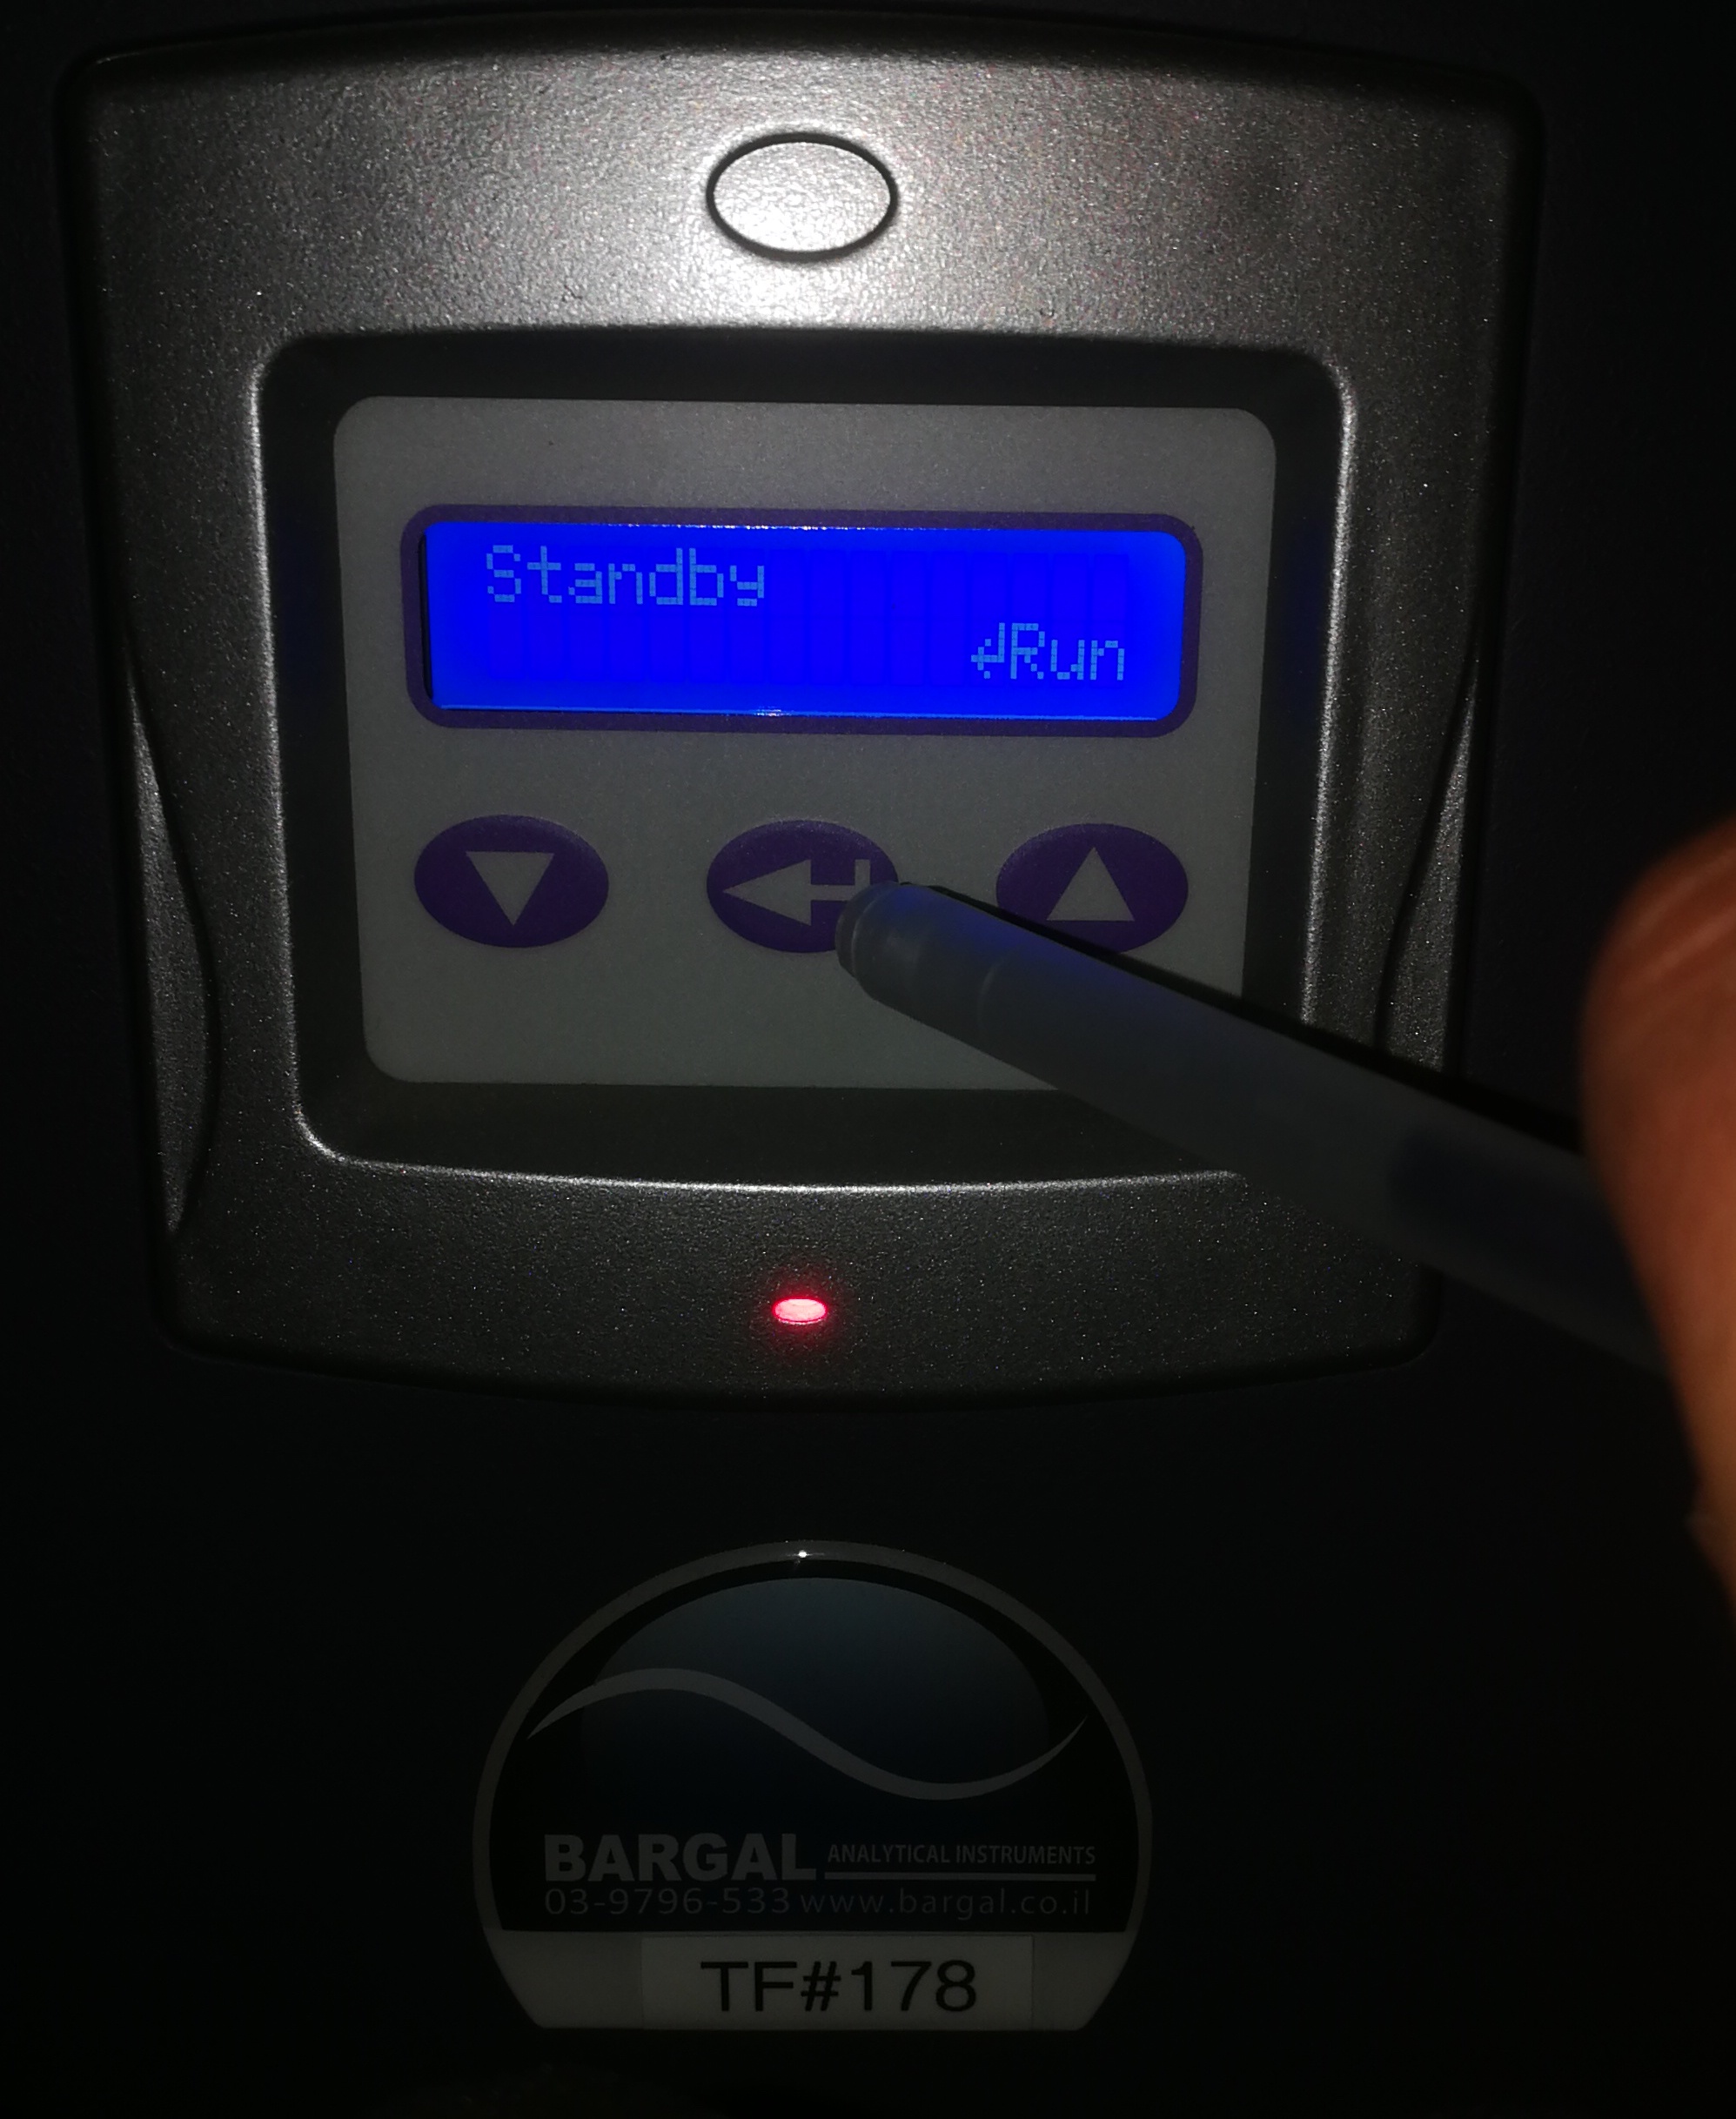
Figure 5.1: Start N2 Generator
5.2.2 Purge pump
The system should be purged before injection of samples. Especially when system has been left in standby mode. Purging of solvents is performed to ensure the lines of the LC are filled with the correct solvents. Purging the system removes any bubbles that might have occurred when in standby mode or when replacing solvent bottles. In case where the system has been running out of solvent, and the lines are dry, use the syringe plunger to draw solvent into the tubing. The syringe plunger is located in the drawer under the UHPLC.
Make sure that use column compartment configuration 5 (bypass, no column used)
It is of utmost importance not to start purging when the purge valve is closed!
The purging solvents should be the same as you are going to use for your expetiments.
Open the door. Be gentle on the door, as it easily comes off the hinges.
Open the purge valve. The purge valve opens counter clockwise and closes clockwise.
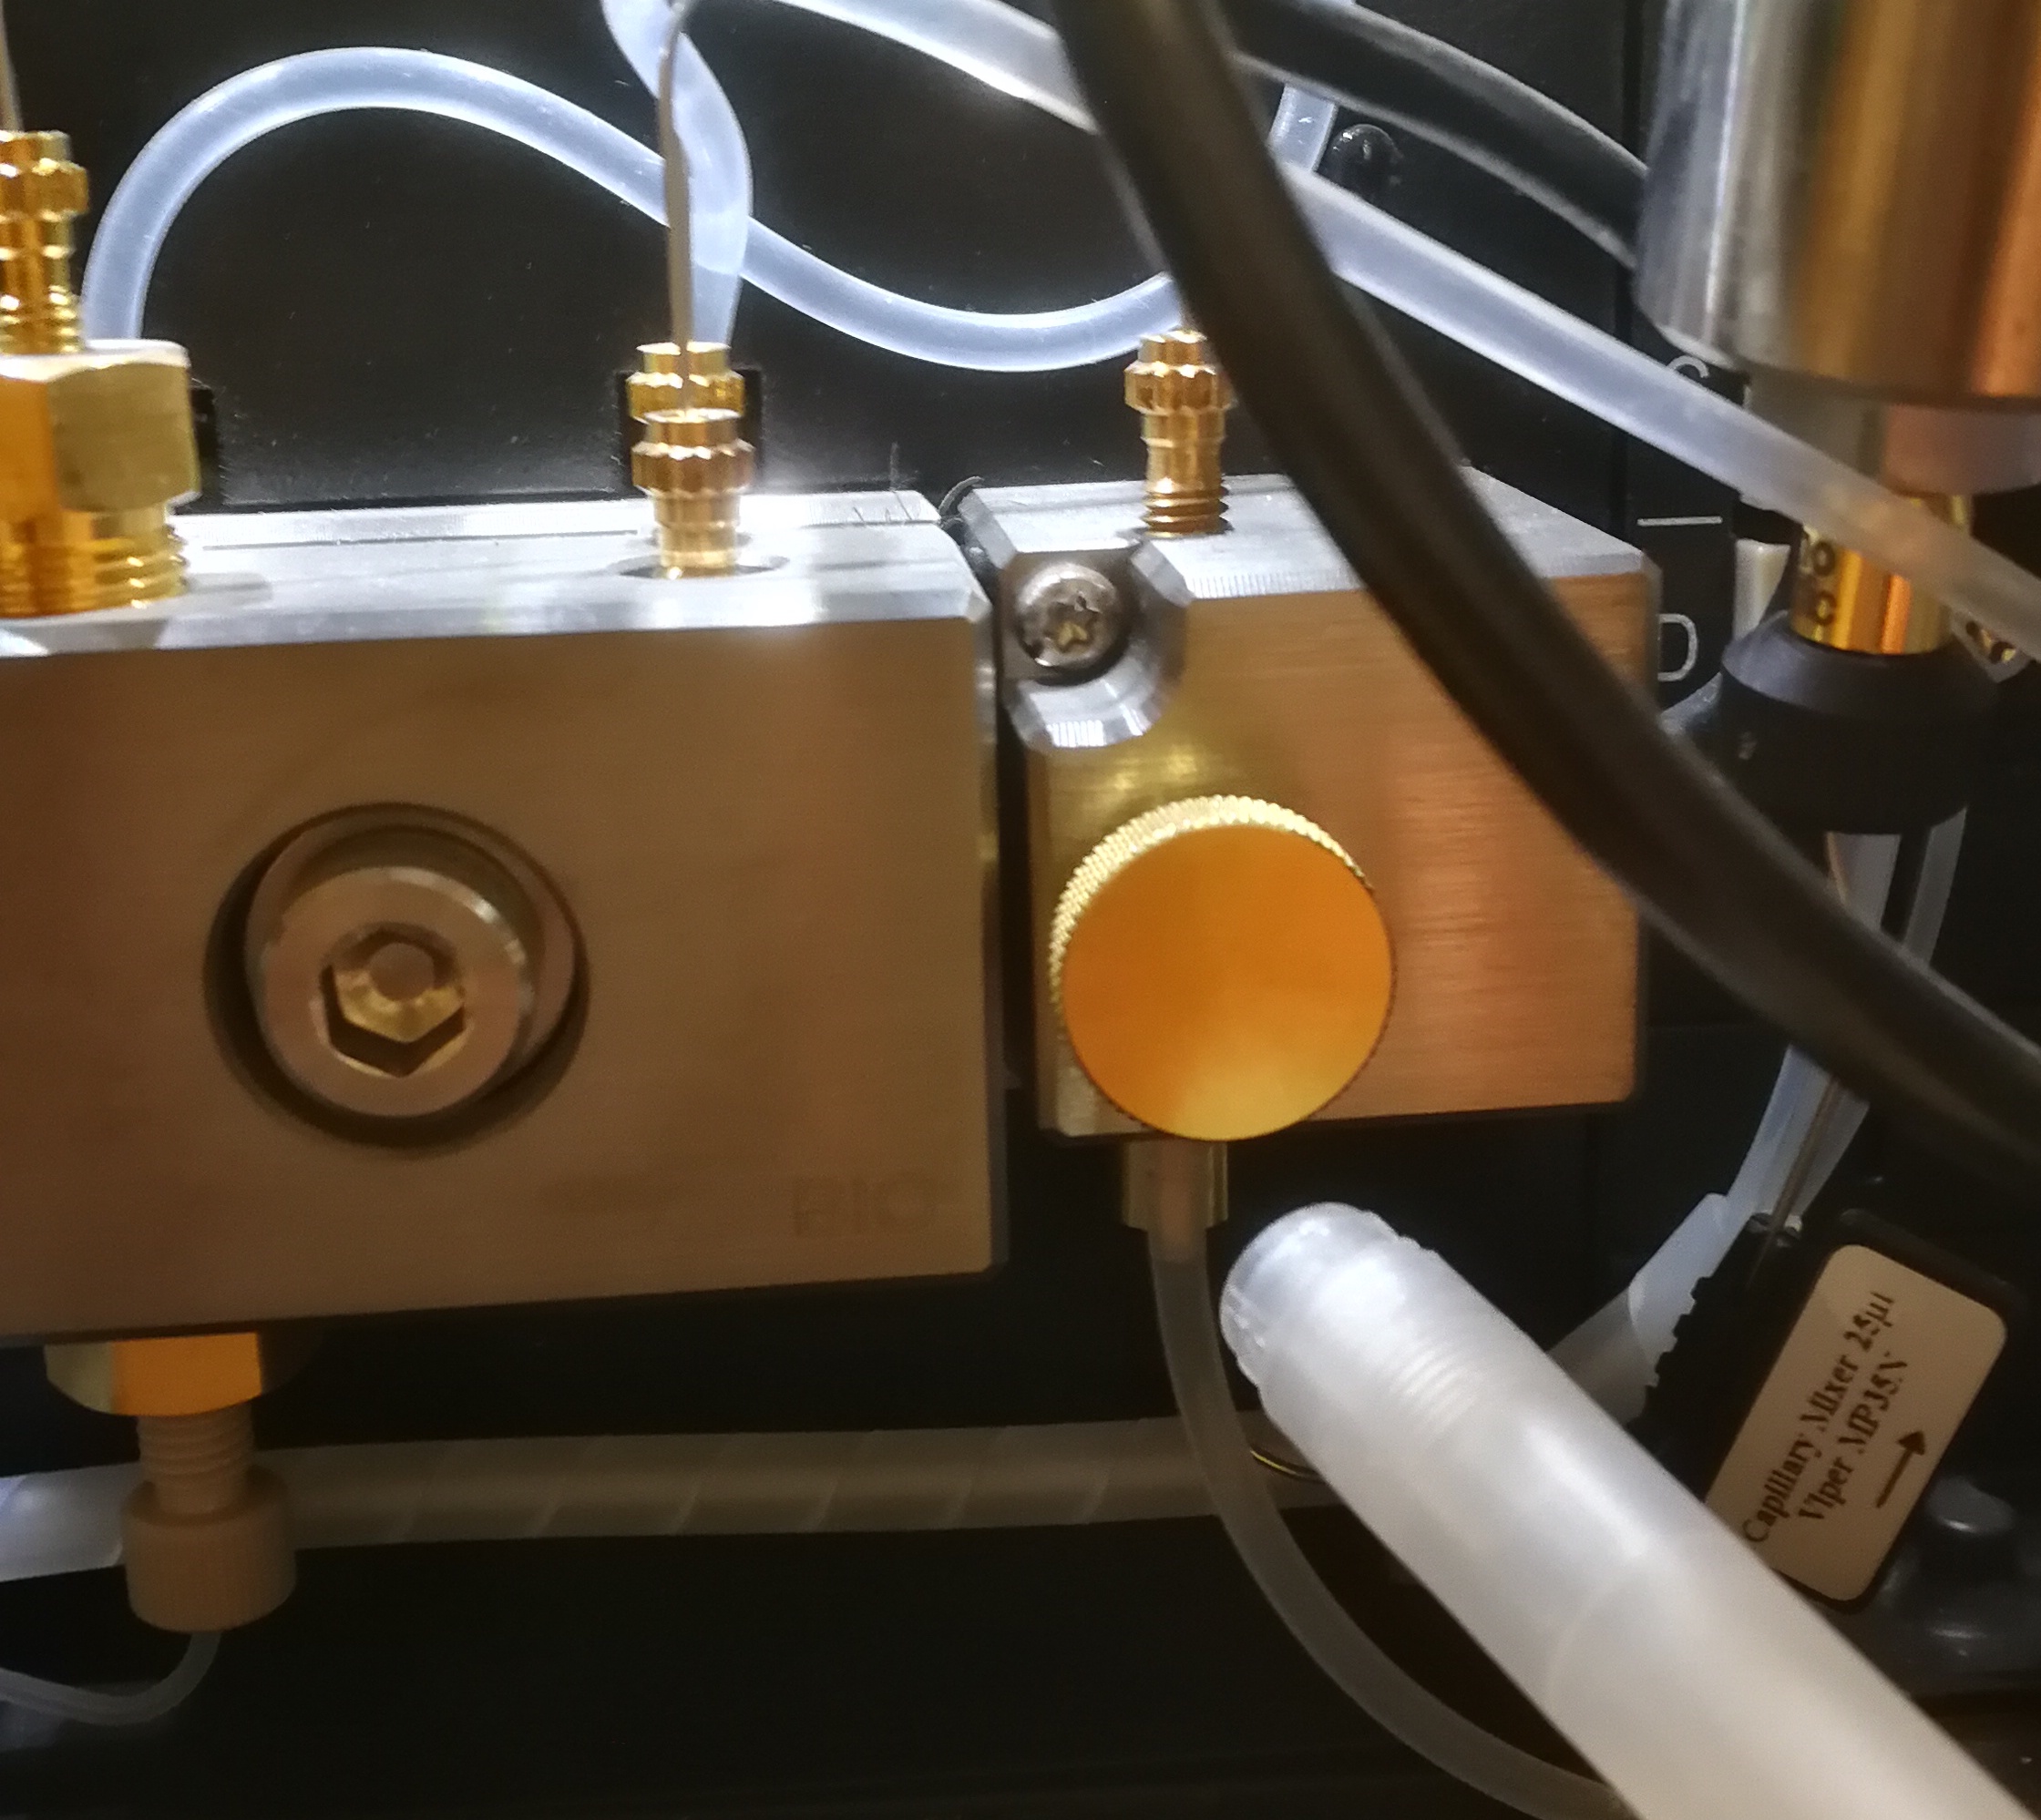
Figure 5.2: Open the door
The solvent select valve is controlled from the pane
Rheodyne.MXIIValve. Chose the appropriate line for purgingA. All lines are marked with a sticker with matching numbers and letters. For instance, the solvent your are going to use is A:9 and C, so you can purge the pump with A:9 and C eluents, respectively.Ensure that the solvent bottle is in the correct position.
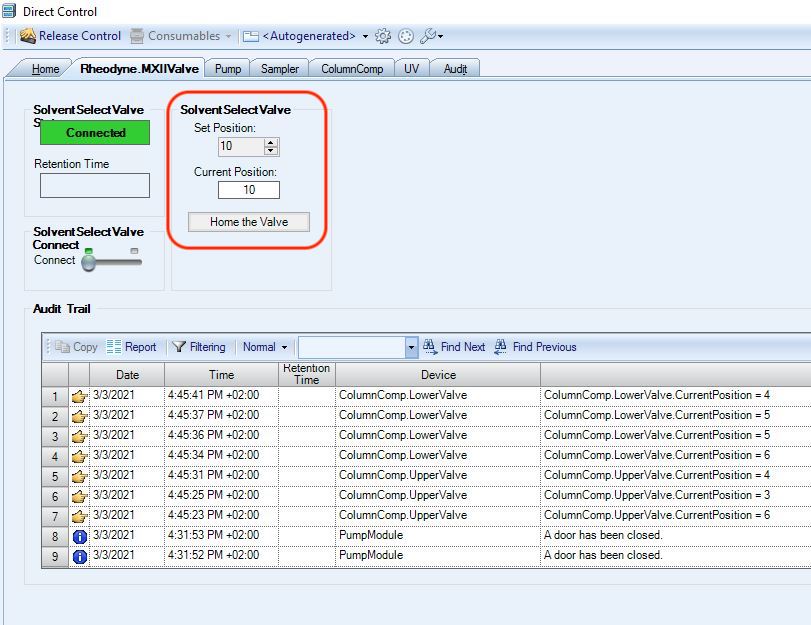
Figure 5.3: Select the right line for Eluent A
The lines B, C, and D are controlled in the pane
pump. The proportion of line A is automatically calculated, and cannot be set manually (for 100% A, set B, C, and D to 0%).Click the
More Options…button in thePumppane. This opens a window that enables purging. (purge can also be started from the ‘Home’ pane). e.g., set flow to 6 mL/min for 300 seconds.Click the purge button.
Remember to close the purge valve after finishing purge!
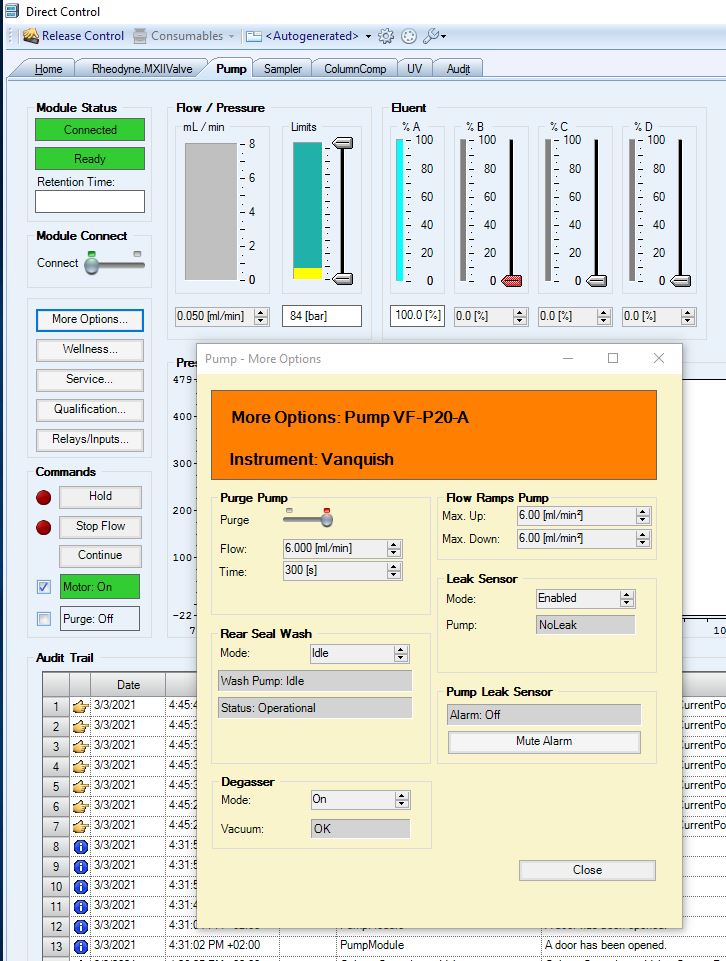
Figure 5.4: Purge the pump
5.2.3 Wash needle
Use magic mix (eluent A, Line 9: ACN:MeOH:IPA:Water, 1:1:1:1 + 0.2% FA), flow rate: 0.1 ml/min, for 30 min.
Make sure to use column compartment configuration 5 (bypass, no column used)
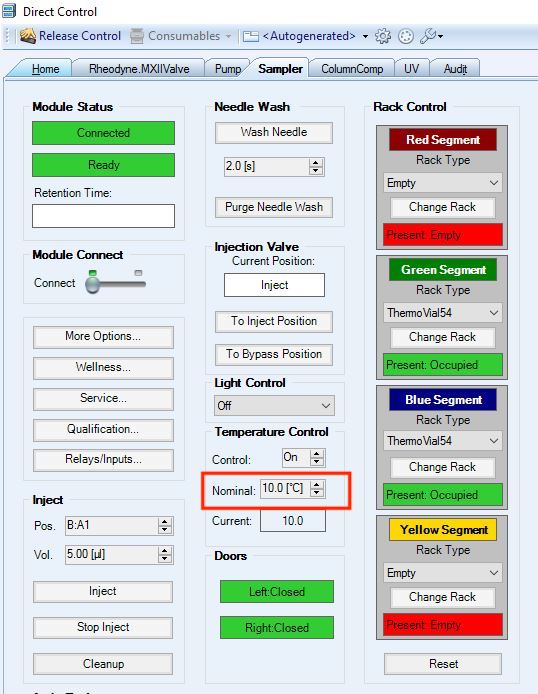
Figure 5.5: Needle wash
5.2.4 Turn on UV lamp
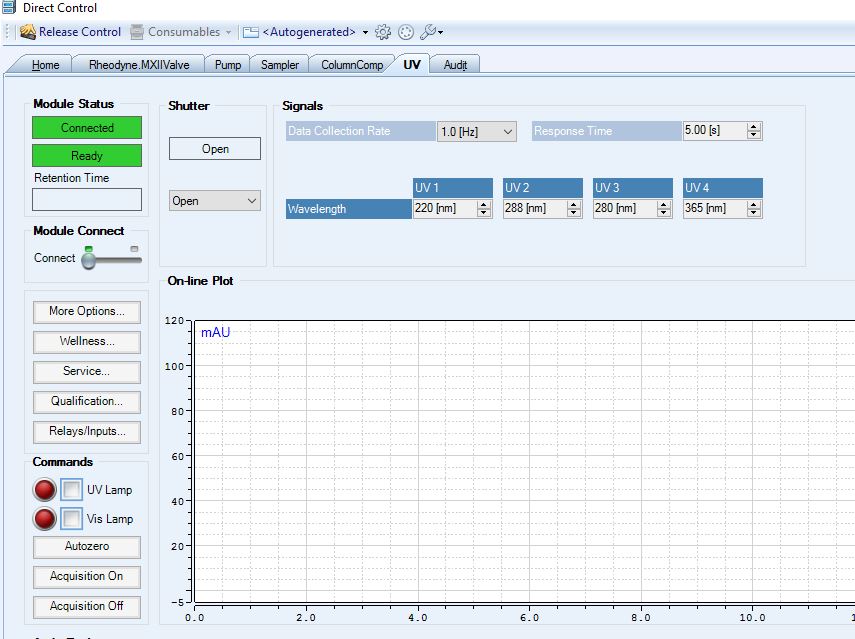
Figure 5.6: Turn on UV
5.2.5 Select column and set column temperature
5.2.6 Set autosampler temperature
Set temperature according to the instrument method
5.2.7 Equilibrate column
Remember to equilibrate column prior to sample injection.
Use the initial solvent composition to equilibrate the column
Check pressure in the ‘Pump’ pane. Be aware that high backpressure can ruin/break the flow cell in the UV detector. So pay attention to the backpressure when starting equilibrating the column.
Start low flow using starting conditions of analytical assay (refer to instrument method or assay SOP). Stepwise increase the flow and monitor pressure.
5.2.8 Check solvent levels
Ensure solvent levels are sufficient for the number of samples in the sequence. Check additionally line A10 (system standby solvent) and seal wash bottle.
5.2.9 Build Sequence
Add
low flow methodat the end of the sequence. Make sure to select thelow flow methodwith correct column attached.Make sure that the low flow goes to valve 2, because we want the flow to go through the needle in order to eliminate the risk of precipitation.
5.3 Trouble shooting
5.3.1 Direct control software indicates that seal wash bottle is dry, even through there is enough seal wash solution
Reason:
It is probably the sensor was not connected well.
Solution:
Place seal wash detector assembly in the right position
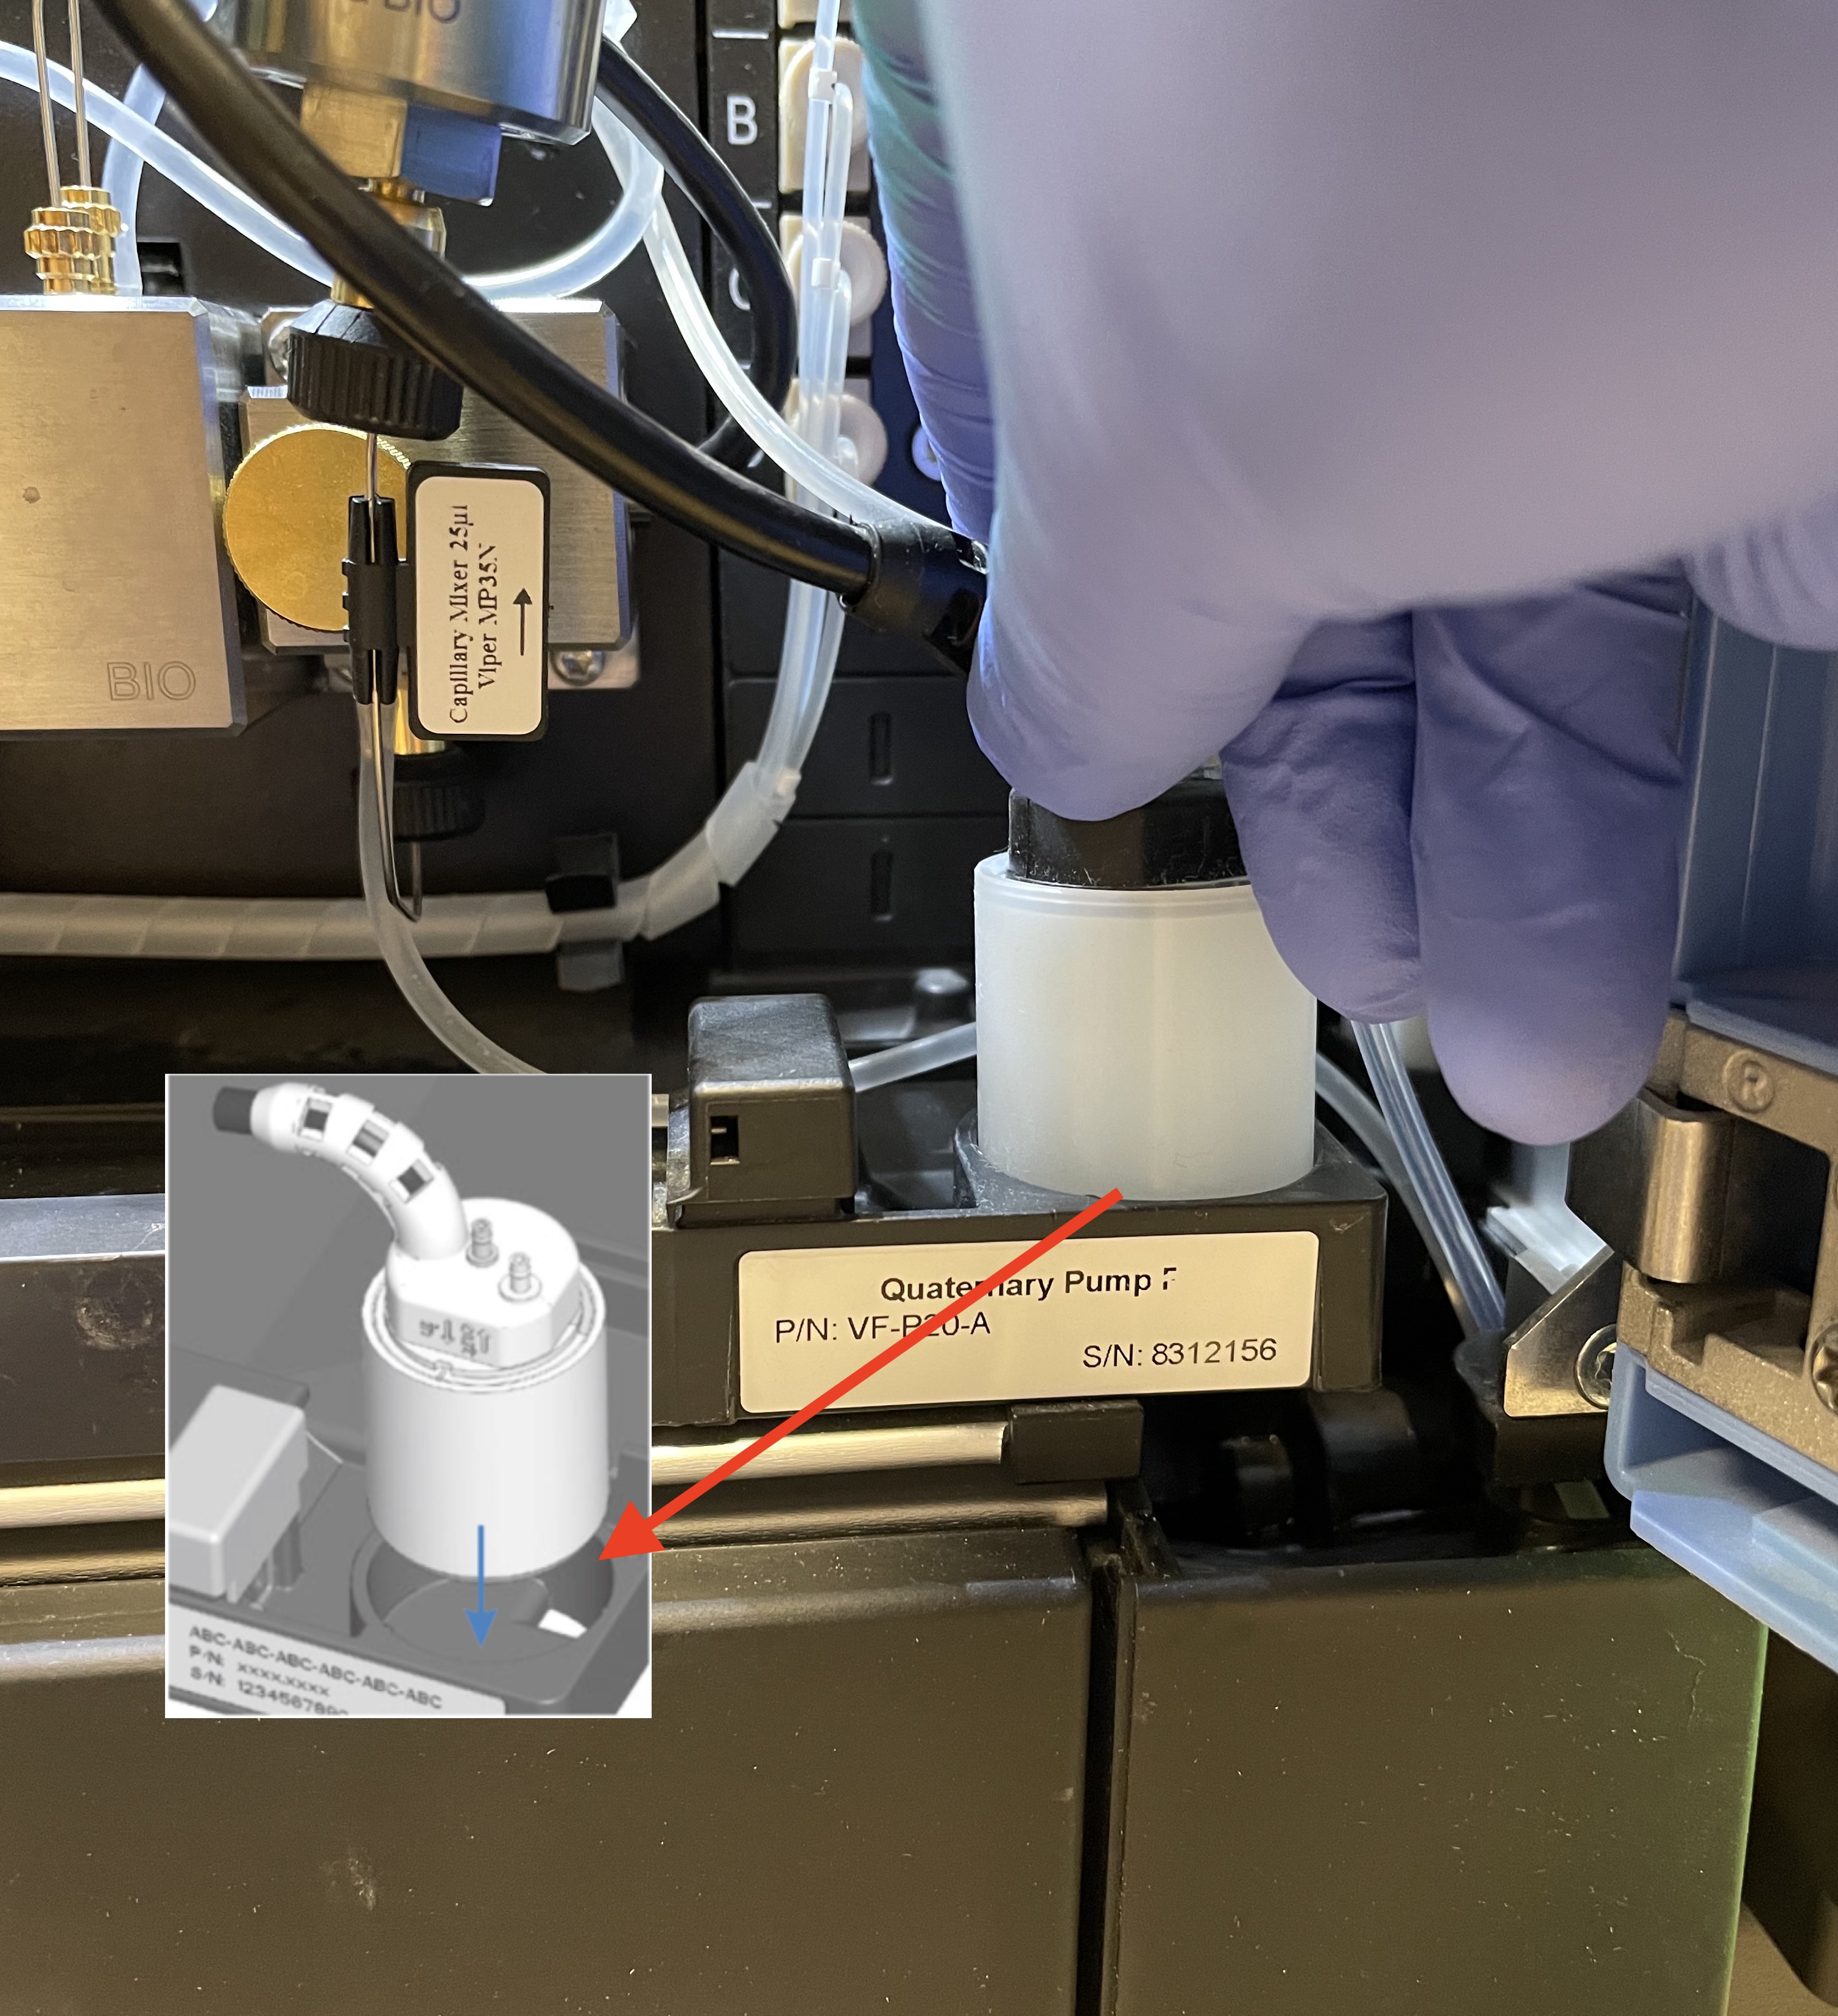
Figure 5.7: Put the seal wash sensor
5.3.2 Pump Code 4099 Pressure fallen below lower limit.
Possible reasons:
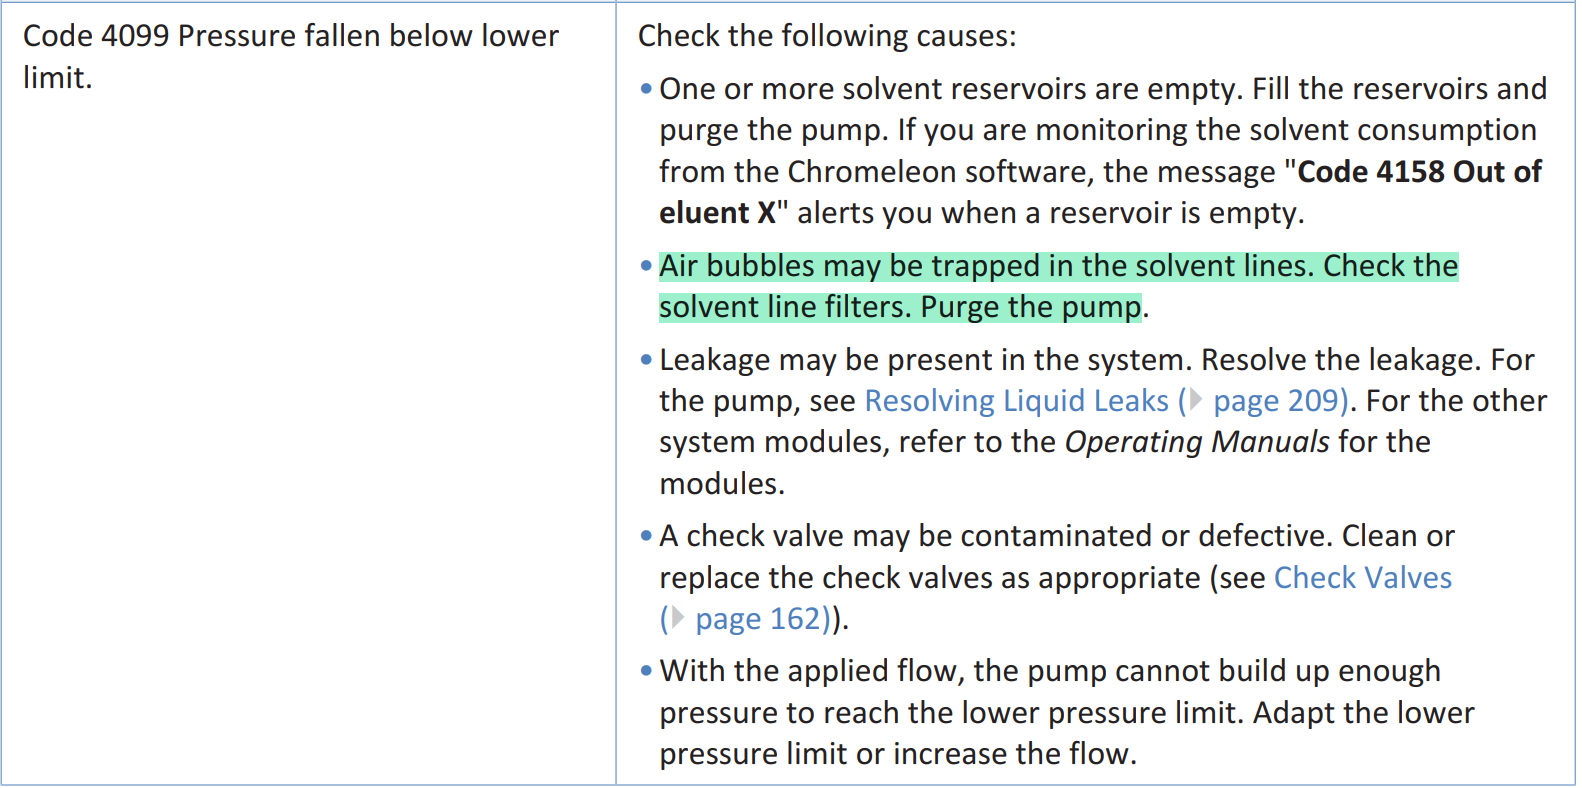
Figure 5.8: Pressure fallen below lower limit
The one I have encountered is highlighted in green in Figure 5.8.
Solution:
Because of the pump error, I cannot purge the pump from Direct Control software. So I can directly purge it from LC. see Figure 5.9.

Figure 5.9: Pump purge from LC
5.3.3 LCMS system contamination by dibutylamine
Description:
The ion-pairing reagent dibutylamine was used for energy metabolite analysis at negative mode. The problem is that it produces a dominant peak at m/z 130.15 at positive ion mode, which unfortunately suppress the detection of other ions. In addition, I found it extremely hard to get rid of this peak. I have tried different wash solutions and cleaned the system thoroughly, but the peak persistently remained within the LCMS system.
Solution
Flushing the lines with normal flow rate (e.g., 0.4 ml/min) is not so efficient. I have flushed the line for a week. The ion intensity indeed reduced, but it is too time consuming.
Purging (e.g., 6 ml/min) for hours with 1% formic acid in water is much more efficient, and the ion intensity of the contanminant peak reduced significantly.